Introduction
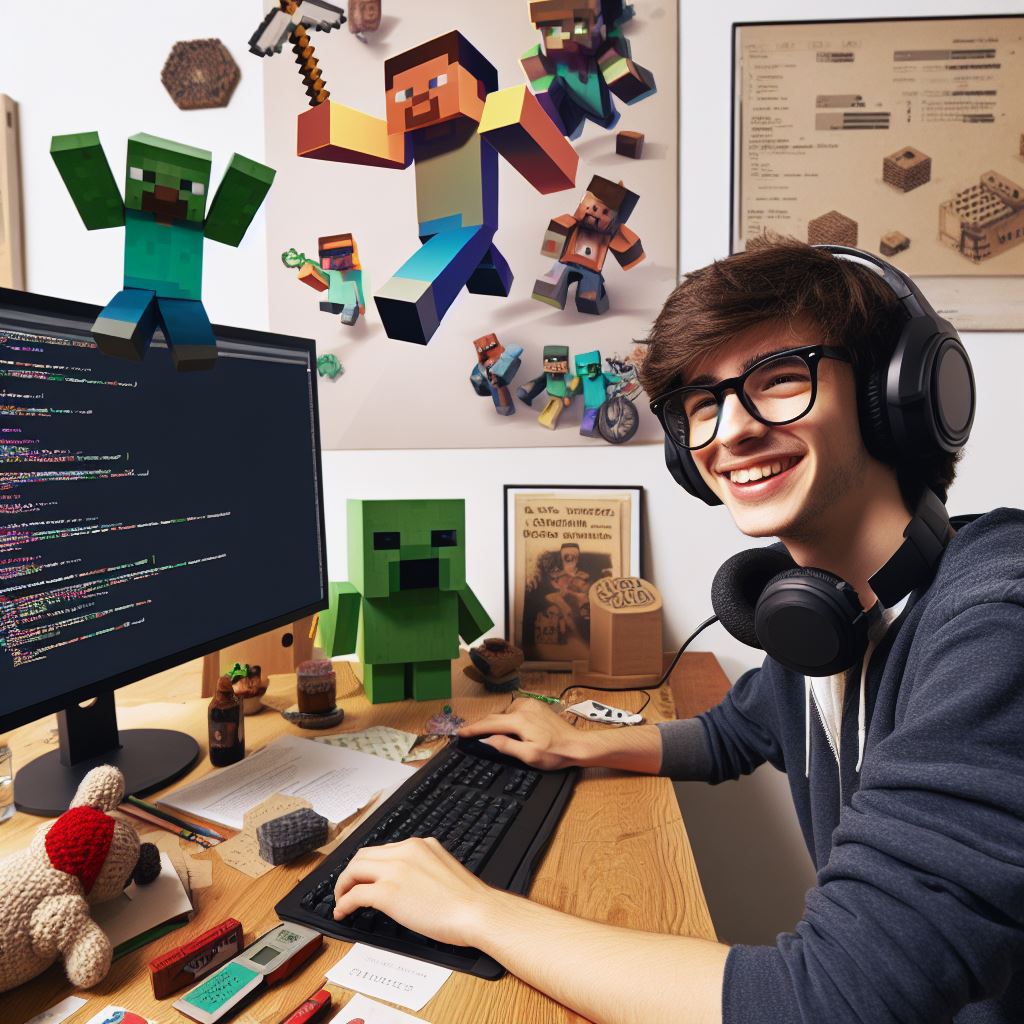
Minecraft, the immensely popular sandbox game, invites players into a vast and imaginative world, where they can construct, explore, and survive in an open-ended environment.
The significance of coding within Minecraft is not confined to the game itself.
It serves as a potent tool for nurturing problem-solving skills, fostering creativity, and introducing players to essential programming concepts.
In this blog post, we embark on a journey to uncover the multifaceted world of coding in Minecraft.
We’ll explore its educational value, creative potential, and the exciting opportunities it offers for both seasoned programmers and beginners alike.
Overview of Minecraft coding projects
In this section, we will explore the various coding projects that can be done in Minecraft.
Coding in Minecraft not only enhances your gaming experience but also develops valuable skills in programming.
Benefits of coding in Minecraft
- Enhances problem-solving skills: Minecraft coding projects require players to think critically and solve complex problems.
- Improves creativity: Coding enables players to create unique worlds and structures, fostering their creativity.
- Develops logical reasoning: Coding in Minecraft helps improve logical thinking and logical reasoning abilities.
- Boosts computational thinking: Players develop computational thinking skills by breaking down complex tasks into smaller steps.
- Encourages collaboration: Minecraft coding projects often involve working in teams, promoting effective collaboration and teamwork.
Different types of coding projects
Minecraft offers a wide range of coding projects that cater to various interests and skill levels. Here are some examples:
- Building a house with a functioning door that opens and closes using redstone circuits.
- Creating a mini-game within Minecraft using command blocks and functions.
- Designing a maze or puzzle that players must solve using coding techniques.
- Developing a mod that introduces new items, tools, or creatures into the Minecraft world.
- Programming a virtual assistant NPC (non-player character) with dialogue and interactive features.
Importance of project selection for skill development
Choosing the right coding project in Minecraft is crucial for skill development and overall learning. Here’s why:
- Interest and motivation: Selecting a project that aligns with your interests keeps you motivated throughout the coding process.
- Appropriate skill level: Picking a project that matches your current skill level ensures a challenging yet achievable experience.
- Targeted learning objectives: Different projects focus on specific programming concepts, allowing you to learn and practice different skills.
- Personalization and creativity: Minecraft coding projects offer room for personalization and creativity, enabling you to showcase your unique ideas.
- Continuous growth: By selecting projects that gradually increase in complexity, you can consistently challenge yourself and experience steady growth.
In fact, coding in Minecraft provides numerous benefits such as enhancing problem-solving skills, improving creativity, and boosting logical reasoning.
Minecraft offers various types of coding projects, allowing players to explore different programming concepts.
Selecting the right project is essential to maximize skill development and foster continuous growth.
So, pick a project that excites you and dive into the fascinating world of Minecraft coding!
Read: 5 Trends Shaping the Future of Hospital Coding
Coding Project 1: Building a Simple House
Basic structure and design
- Start by selecting a suitable location in your Minecraft world to build your simple house.
- Determine the size and shape of your house and the materials you want to use.
- Use blocks such as wood, stone, or bricks to create the walls, floors, and roof of your house.
- Add windows and a door to make your house more visually appealing and functional.
Implementing redstone circuits for lighting and door control
- Redstone circuits allow you to create mechanisms and automate certain functions within your house.
- Place redstone torches, repeaters, and comparators to create circuits that control lighting systems.
- Connect your lights to the redstone circuits and use switches or pressure plates to control them.
- Set up a redstone circuit that activates your door, allowing you to open and close it easily.
Adding interactive elements using command blocks
- Command blocks are powerful tools that allow you to create custom interactions and events in Minecraft.
- Use command blocks to add interactive elements to your simple house, such as a working fireplace.
- Create a command block that summons fire particles when activated, giving the illusion of a burning fire.
- You can also use command blocks to add teleportation systems or create hidden passages within your house.
By building a simple house in Minecraft and implementing these coding projects, you can enhance your Minecraft experience and unleash your creativity.
Tech Consulting Tailored to Your Coding Journey
Get expert guidance in coding with a personalized consultation. Receive unique, actionable insights delivered in 1-3 business days.
Get StartedNot only will you have a functional and visually appealing house, but you will also learn valuable coding skills along the way.
Remember, these coding projects can be adapted and expanded upon to match your creativity and skill level.
Experiment with different designs, materials, and command block functions to create unique and personalized houses in Minecraft.
The possibilities are endless!
In short, coding projects in Minecraft offer a fun and interactive way to learn coding while enjoying the creative world of Minecraft.
Starting with a simple house is just the beginning. As you gain experience, explore complex coding projects to craft impressive structures.
Get coding and build your dream Minecraft house!
Read: How to Get Started with Minecraft Coding for Kids
Coding Project 2: Creating a Mini-Game
A mini-game in Minecraft can add excitement and challenge to your gameplay.
With the help of coding, you can create your own unique mini-game with custom mechanics, textures, and sounds.
In this section, we will guide you through the process of creating a mini-game in Minecraft.
Choosing a concept for the mini-game
The first step in creating a mini-game is to choose a concept. Think about what kind of game you want to create.
It could be a parkour challenge, a puzzle game, a race, or even a combat game. Let your imagination run wild!
List of possible mini-game concepts:
Build Your Vision, Perfectly Tailored
Get a custom-built website or application that matches your vision and needs. Stand out from the crowd with a solution designed just for you—professional, scalable, and seamless.
Get Started- Parkour challenge
- Puzzle game
- Race
- Combat game
- Treasure hunt
Once you’ve decided on a concept, it’s time to move on to implementing the game mechanics.
Implementing game mechanics using command blocks
Command blocks are essential for creating custom game mechanics in Minecraft. They allow you to execute commands and trigger events in the game.
Use command blocks to set up the rules, objectives, and actions for your mini-game.
List of game mechanics you can implement:
- Timer
- Scoring system
- Checkpoint system
- Teleportation
- Power-ups
- Obstacles
Experiment with different command blocks and their functions to create a challenging and exciting mini-game experience.
Designing custom textures and sounds for the mini-game
To make your mini-game truly unique, you can design custom textures and sounds.
Minecraft allows you to create resource packs, which can change the appearance and audio of the game.
Use a graphics editor to design textures and a sound editor to create custom sounds.
List of elements to design:
- Game logo
- Player skins
- Game items
- Background music
- Sound effects
Designing custom textures and sounds will add a professional touch to your mini-game and make it more immersive for players.
By following these steps, you can create your own mini-game in Minecraft with unique mechanics, textures, and sounds.
Remember, the only limit is your imagination! So start coding and let your creativity shine in the world of Minecraft.
Read: Beginner’s Guide to Coding in Specialty Hospitals
Coding Project 3: Developing a Custom Mod
Introduction to modding in Minecraft
Modding in Minecraft allows you to enhance and customize your gaming experience.
Optimize Your Profile, Get Noticed
Make your resume and LinkedIn stand out to employers with a profile that highlights your technical skills and project experience. Elevate your career with a polished and professional presence.
Get NoticedBy creating your own mods, you can add new features, items, blocks, and even gameplay mechanics to the game.
Selecting a modding platform and tools
Before you start creating your custom mod, you need to choose a modding platform and the necessary tools. Here are some popular options:
- Forge: Forge is a widely used modding platform for Minecraft that provides a flexible and powerful framework for mod development.
It offers a vast array of APIs and libraries to help you create complex mods. - Fabric: Fabric is another modding platform that provides a lightweight and easy-to-use framework.
It focuses on mod compatibility and performance, making it a great choice for beginners. - Mod Maker: If you’re new to modding or prefer a visual approach, you can use tools like Mod Maker.
These tools provide a user-friendly interface for creating mods without writing code.
Creating a simple mod with custom features
Now that you have chosen your modding platform and tools, let’s dive into creating a simple mod with custom features. Follow these steps:
- Set up your modding environment: Install the modding platform and tools you selected and set up a new mod project.
- Define your mod’s features: Decide what custom features you want to add to Minecraft.
It could be new blocks, items, or even gameplay mechanics like special abilities or custom crafting recipes. - Write the code: Use Java, the main programming language for Minecraft modding, to write the code for your mod.
You’ll need to learn the modding platform’s APIs and understand how to interact with Minecraft’s codebase. - Test and debug: Once you’ve written the code, it’s time to test your mod in Minecraft. Launch the game with your mod installed and make sure everything works as intended.
Debug any issues you encounter along the way. - Refine and improve: After testing, gather feedback from players and other modders to improve your mod.
Listen to their suggestions and make necessary changes to enhance the overall experience. - Publish your mod: Share your mod with the Minecraft community by uploading it to mod hosting platforms like CurseForge or the Minecraft Forum.
Provide detailed information about your mod and encourage users to provide feedback. - Maintain and update: Keep your mod up to date with the latest version of Minecraft and address any compatibility issues that may arise.
Continuously maintain and improve your mod based on user feedback.
In essence, developing a custom mod in Minecraft can be a rewarding and creative experience.
Choosing the right modding tools, crafting unique features, and following the development process enables game-changing mods.
So go ahead, unleash your creativity, and start creating your own Minecraft mods!
Coding Project 4: Designing a Treasure Hunt
Creating clues and hiding locations
- Begin by brainstorming clues that will lead players to the hidden treasures.
- Use Minecraft’s signs or chat commands to provide hints and instructions.
- Design clues that require players to explore different parts of the Minecraft world.
- Hide treasure chests in clever locations such as underwater caves or high treetops.
- Consider adding riddles or puzzles as clues for an added challenge.
Setting up command blocks for clue interactions
- Utilize command blocks to trigger events when players interact with clues.
- Use commands like /tp to teleport players to new locations after solving a clue.
- Consider using /give commands to reward players with new items or tools.
- Use conditional command blocks to ensure players complete each clue in the correct order.
- Test and debug the command block setup to ensure smooth gameplay.
Implementing rewards and progression system
- Decide on the rewards players will receive for completing the treasure hunt.
- Rewards can include valuable items, rare Minecraft blocks, or access to new areas.
- Create a progression system that tracks players’ progress through the treasure hunt.
- Use scoreboard objectives to keep track of completed clues or hidden treasures found.
- Consider adding a final reward for completing the entire treasure hunt, such as unlocking a special area or gaining a unique ability.
Generally, designing a treasure hunt in Minecraft allows for a fun and interactive coding project that challenges players to explore and solve puzzles.
Creating clues, command blocks, rewards, and a progression system ensures an immersive treasure hunt experience in Minecraft.
Read: Code Review Checklist for Evaluating Coding Blocks

Coding Project 5: Building an Automated Farm
Designing a Functional Farm Layout
Designing a functional farm layout in Minecraft involves careful planning and organization of different sections.
- Start by selecting a suitable location for your farm. Consider factors like accessibility, space, and availability of resources.
- Divide your farm into different sections based on the type of crops you want to grow. This will help optimize efficiency.
- Create pathways between each section to easily navigate and monitor your farm.
- Make sure to leave enough space for water sources that will hydrate your crops and prevent them from withering.
- Consider using fences or walls to separate your farm from the surrounding environment and protect your crops from trampling or animals.
Using Redstone Mechanisms for Automatic Planting and Harvesting
Redstone mechanisms can be used to automate the planting and harvesting process in your farm, making it more efficient and less time-consuming.
- Use dispensers and observers to automatically plant seeds or saplings in designated areas.
- Connect them to a timer or pressure plate system for periodic or triggered planting.
- Utilize sticky pistons to create harvesters that break mature crops and collect them in a central location.
- Redstone comparators can be used to detect the growth stage of crops. This information can then be used to activate the harvesters at the appropriate time.
- Combine redstone lamps and daylight sensors to create a system that turns on artificial lighting during nighttime, ensuring constant crop growth.
Integrating Hoppers and Storage System for Efficient Resource Management
Integrating hoppers and a storage system into your automated farm will streamline resource management and ensure a smooth operation.
- Place hoppers below your harvesters to collect the dropped crops and direct them into chests or storage silos.
- Use hoppers to transfer items from the dispensers or other input systems to the planting areas.
- Build a sorting system using hoppers and filters to automatically organize harvested crops based on type.
- Connect your storage system to an item sorter that distributes items to different storage containers, making it easy to find specific resources.
Basically, building an automated farm in Minecraft takes careful planning, efficient use of redstone mechanisms, and integration of hoppers and storage systems.
With a well-designed layout and automation, you can maximize crop production, save time, and enjoy the benefits of a self-sustaining farm in the world of Minecraft.
Happy coding!
Coding Project 6: Constructing a Jumping Parkour Course
A Jumping Parkour Course is a fun and challenging project that you can create in Minecraft.
This project will test your coding skills and creativity as you arrange parkour elements, implement checkpoints and a timer, and add a scoring system with a leaderboard.
Let’s dive in and see how you can create this exciting course!
Arranging challenging parkour elements
Creating a Jumping Parkour Course requires you to design and arrange various parkour elements such as platforms, fences, ladders, and trapdoors.
These elements will serve as obstacles that players need to navigate through by jumping and sprinting. The key here is to make the course challenging but not impossible.
To create the parkour elements, you can utilize command blocks and redstone circuits.
For example, you can use command blocks to detect if the player has successfully jumped on a platform and activate the next part of the course.
This will require a basic understanding of command block commands.
Implementing checkpoints and timer using command blocks
To make the Jumping Parkour Course more engaging, you can add checkpoints and a timer.
Checkpoints allow players to resume from a specific point if they fall or fail to complete a section.
The timer adds a competitive element by recording the time it takes for players to complete the entire course.
You can implement checkpoints by using command blocks and redstone circuits.
When a player reaches a particular point in the course, a command block can teleport them to the next checkpoint if they fall.
The timer can be implemented using command blocks that start and stop the timer based on player actions.
Adding scoring system and leaderboard
- To enhance the competitive aspect of the Jumping Parkour Course, you can incorporate a scoring system and leaderboard.
- The scoring system can assign points based on the time it takes for a player to complete the course.
- For example, the faster the player completes the course, the higher their score.
- You can use command blocks to track the time it takes for players to finish the course and assign points accordingly.
- The leaderboard can be displayed using signs or scoreboard objectives to showcase the top scores of all players who have completed the course.
- This will encourage players to compete with each other and improve their skills.
Essentially, creating a Jumping Parkour Course in Minecraft is an excellent coding project that allows you to showcase your creativity and coding skills.
Organizing challenging parkour, adding checkpoints, timers, and a leaderboard, crafts an exciting, competitive course for players.
So, get coding and start constructing your own Jumping Parkour Course in Minecraft today!
Coding Project 7: Designing a Dynamic Roller Coaster
A roller coaster is the epitome of thrill and excitement in theme parks all around the world.
Now, imagine being able to design and create your very own heart-pounding roller coaster in Minecraft!
In this project, we’ll plan, build, and use redstone and command blocks for an exciting roller coaster in Minecraft.
Planning and Building a Thrilling Roller Coaster Track
The first step in designing a dynamic roller coaster is planning out the track layout. Consider elements like twists, turns, drops, and loops to create an exhilarating ride.
Use blocks like rails, powered rails, and detector rails to construct the track.
While designing the track, keep in mind the speed at which the roller coaster should travel. You can adjust the speed by modifying the powered rails’ configuration.
Experiment with different combinations to achieve the desired intensity for your roller coaster.
Incorporating Redstone Mechanisms for Track Switches and Special Effects
To add more interactivity and complexity to your roller coaster, you can incorporate redstone mechanisms for track switches.
This allows players to choose different paths or experience various sections of the roller coaster. Redstone torches and repeaters can be utilized for this purpose.
Additionally, you can create special effects along the roller coaster track using redstone contraptions.
These effects could include dropping anvils, dispensing fireworks, activating piston doors, or even triggering explosions. Let your creativity run wild!
Using Command Blocks for On-Ride Experiences and Interactions
- Command blocks can enhance the roller coaster experience by providing on-ride interactions and experiences.
- For example, you can use command blocks to spawn mobs, play sound effects, display messages, or teleport players to different locations.
- This adds an extra layer of excitement and immersion to your roller coaster.
- Furthermore, you can create multiple branching paths using command blocks, allowing players to make choices during the ride.
- Depending on the path they select, they can be taken on different routes with unique experiences, surprises, or challenges.
- Remember to unleash your creativity while designing the on-ride experiences.
- How about creating a section where players have to shoot targets or a maze-like section where they have to find their way out before their roller coaster plunges down?
Designing a dynamic roller coaster in Minecraft is an incredibly fun and rewarding coding project.
It allows you to unleash your imagination and create an immersive experience for players.
So, grab your tools and get ready to embark on an exciting roller coaster creation journey!
Happy coding and enjoy the adrenaline rush!
Coding Project 8: Creating a Custom Minecraft Skin
Introduction to skin customization
Minecraft offers a wide range of customization options, allowing players to personalize their in-game experience.
One popular way to customize your Minecraft character is by creating a custom skin.
Using external tools or coding to design a personalized skin
- Start by deciding on a concept for your custom skin. It could be anything from your favorite character to a unique design created by you.
- Use external tools such as graphic design software like Photoshop or GIMP to create your custom skin. These tools offer more flexibility in terms of design options.
- Alternatively, you can code your skin using a program like Java. This approach requires coding knowledge but provides complete control over your design.
Importing and applying the custom skin in the game
- Once you have created your custom skin, save it in the appropriate file format. Minecraft skins use the PNG file format.
- Open the Minecraft launcher and click on the “Skins” tab.
- Click on the “Browse” button and locate the file containing your custom skin on your computer.
- Select the file and click “Open” to import it into the launcher.
- After importing, your custom skin will be displayed in the “Preview” window. You can rotate the character to view it from different angles.
- Click “Upload” to apply the custom skin to your Minecraft character.
- Launch the game, and your character will now appear with the custom skin you created.
Creating a custom Minecraft skin allows you to add a personal touch to your in-game avatar.
Whether you choose to use external tools or code your skin, the possibilities are endless.
Craft a unique skin to distinguish yourself in Minecraft. Unleash your creativity and let your skin represent you!
Coding Project 9: Developing a Trading System for Villagers
In Minecraft, villagers play a crucial role in the game, offering various items and resources through trading.
In this coding project, we will explore how to develop a trading system for villagers, allowing players to set up custom trades using command blocks.
Understanding villagers and their trading mechanics
Villagers are non-player characters (NPCs) found in Minecraft villages. They have various professions such as farmers, blacksmiths, librarians, etc.
Each profession offers different trades, allowing players to exchange emeralds for valuable items.
To start developing a trading system, it is important to understand the basics of villagers’ trading mechanics.
Villagers have a limited number of trades, and each trade consists of an input item and an output item.
When a trade is completed, the villager’s inventory refreshes and new trades become available.
Setting up custom villager trades using command blocks
To create a custom trading system for villagers, we will utilize command blocks, which allow us to execute commands automatically in the game.
Here are the steps to set up custom villager trades:
- Place a command block in the desired location, where players will interact with villagers.
- Enter the command “/summon villager ~ ~ ~ {Offers:{}}”, which summons a new villager with no trades.
- Open the command block interface and enter the command “/data merge entity @e[type=villager,limit=1] {Offers:{}}”.
This clears any existing trades from the villager. - Next, we can add custom trades to the villager. Use the command “/data modify entity @e[type=villager,limit=1] Offers.
Recipes append value {buy:{id:”minecraft:item”,Count:1b},sell:{id:”minecraft:item”,Count:1b}}”.
Replace “minecraft:item” with the desired input and output items. - Repeat step 4 to add more trades to the villager. Each trade created will appear as a separate offer when interacting with the villager.
Testing and balancing the trading system
Once the custom trading system is set up, it is important to test and balance the trades to ensure a fair gameplay experience.
Here are some guidelines to consider:
- Ensure the input items are obtainable in the game, making the trades achievable for players.
- Balance the trade ratios, considering the value and rarity of the input and output items. Balanced trades create an engaging economy within the game.
- Test the trading system from the player’s perspective, ensuring the commands and trades work as intended.
- Solicit feedback from players and make adjustments based on their suggestions. This helps create an enjoyable trading experience.
Most importantly, developing a trading system for villagers in Minecraft adds depth and customization to the game.
By understanding villagers’ mechanics and utilizing command blocks, players can create unique trading experiences for themselves and others.
Testing and balancing the trades is crucial to ensure fairness and engagement within the game.
So, why not embark on this coding project and enhance the trading aspect of Minecraft?
Coding Project 10: Building an Automated Sorting System
Building an automated sorting system in Minecraft is an exciting coding project that enhances efficiency and scalability within the game.
By designing a modular sorting system using chests and hoppers, players can easily sort and organize items in their inventory.
Additionally, creating redstone contraptions allows for the automation of the sorting process, saving players time and effort.
Designing a modular sorting system using chests and hoppers
- Start by placing multiple chests in a row, creating a storage area. Each chest will represent a specific category for sorting (e.g., weapons, resources, tools).
- Connect hoppers at the back of each chest. Hoppers will serve as a mechanism to transport items between different chests.
- As items are added to one chest, they will flow through the hoppers and distribute themselves into the correct chest based on their category.
- Label each chest using signs to provide clear indications of their respective categories. This will make item organization much simpler and more efficient.
Creating redstone contraptions for sorting items automatically
- Use comparators to detect when chests are full. Comparators emit a redstone signal that can be utilized to trigger specific actions.
- Connect redstone dust from the comparator to a redstone repeater circuit to activate the sorting mechanism when a chest is full.
- Incorporate droppers and water flow systems to transport items from one chest to another. This will ensure that each item reaches the correct destination.
- Utilize observer blocks to detect when new items are added to the system. Observers emit a redstone signal when a block adjacent to them gets updated.
- Connect the output of the observer block to a redstone circuit that triggers the movement of items through the hopper system.
Enhancing efficiency and scalability of the sorting system
- Use multiple rows of chests and hoppers to increase the capacity of the sorting system. This allows for the storage and sorting of a larger number of items.
- Utilize item filters to prioritize specific items within the sorting system.
By adding additional hoppers with filters, players can ensure certain items are always placed in specific chests. - Create separate sorting systems for different resources or areas of the game world. This allows for more efficient and targeted item organization.
- Incorporate item transportation systems, such as minecart rails, to move items across larger distances within the sorting system.
- Experiment with different designs and layouts to find the most efficient and visually appealing sorting system for your specific needs.
Building an automated sorting system in Minecraft not only saves time and effort but also adds a level of complexity and functionality to the game.
By using chests, hoppers, redstone contraptions, and efficient designs, players can create a sorting system that enhances their overall gameplay experience.
Whether organizing resources, weapons, or tools, a well-designed sorting system provides a seamless and efficient method for managing items in Minecraft.
Conclusion
Throughout this section, we explored ten exciting coding projects that you can dive into in Minecraft today.
From creating a virtual pet to building a mini-game, these projects offer endless possibilities for coding enthusiasts.
However, these ten projects are just the tip of the iceberg. Minecraft is a vast sandbox that allows you to stretch your creativity and coding skills to new heights.
There are numerous coding opportunities waiting to be discovered.
As we conclude this section, I invite you to embark on your coding journey in Minecraft.
Don’t shy away from experimenting, exploring, and pushing the boundaries of what you can achieve. Let your imagination soar and share your experiences with us!